Photo Walls Made Easy
Since this seems to be a very popular topic based on our feedback, we have decided to do our best to offer more topics in this area!
With this post we will point out a few simple steps to help you outline the perfect space in your home to create a photo art wall! Go to any home and you are bound to find plenty of empty wall space. Why? Because typically people find hanging portraits a difficult and challenging task.
There is also the fear of putting holes in the wall only to find you hate the way the portraits look when they are hung. Well, there are solutions for these problems!
IT'S ALL IN THE PLANNING
Give thought to the space you want to liven up. Once you have an area picked out then you can measure the area and get a general idea of sizes of pictures you may want to incorporate. Generally speaking anything smaller than an 8" x 10" tends to get lost on a large wall, so be sure to think those things through!
STICK IT TO ME
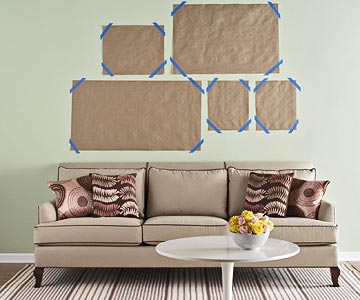
Once you know your sizes, lay your frames (or if you don't have frames yet, you can get a general measurement by taking the size of the image and add about 4" for the width of the frame. So if you would like to hang an 8" x 10" image, trace out a 12" x 14" frame) on a roll of kraft paper and trace around them. Cut each frame out separately. You now have "frames" that you can hang on the wall with blue painters tape (which will not peal paint off your wall), to gauge where you will hang your final framed images.
STAY IN THE LINES
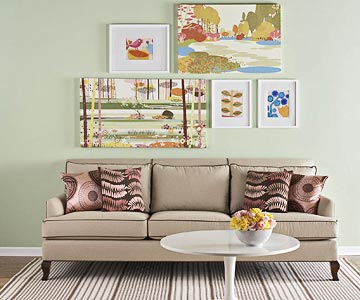
Keep moving your paper frames around until you love the look! Be sure to allow approximately 2" between your frames. Then you can finish up your project with ease by simply hanging your frames over the paper spots as shown. The sample shows a great way to create a display, buy drawing an "imaginary" line and then working above and below the line to create an organized look. Perfect for the beginner!


STAGGERING IMAGES
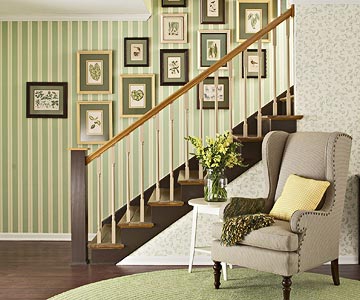
Staircases can sometimes pose a challenge, but they are one of the best pieces of real estate in the home to hang your portraits. It is an area that is very visible to guests and family and offers plenty of room for creativity. An uneven pattern is usually much more interesting in this area, and it is also a great way to slowly build your display. Vary the spacing between the frames to create a more interesting view, but be sure to stick to a "color scheme" to keep it from becoming too busy to the eye.
Here is a great example of a gorgeous stairwell display. Imagine this in your home with pictures of your family....talk about showstopping!

SYMMETRICAL DISPLAYS
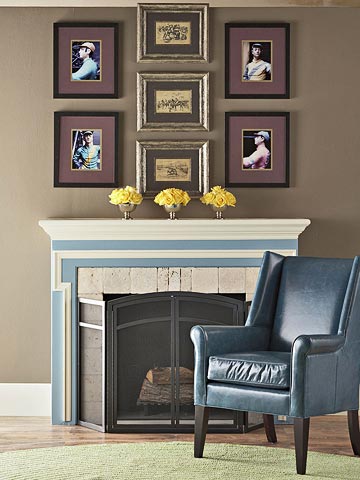
Another great idea, is to create a more symmetrical look by using (2) sized images in a grid like format. This type of display tends to work best over a table or mantel as shown. By using 3 horizontal images in the center and 2 vertical images of the same size on either side of those, you are creating a dramatic look that becomes a focal point without being overpowering.
Perfect for those who may be a little afraid to stretch their wings and create a space with a variety of sizes!

Have a great display that you created in your own home that you would love to share with our readers?
Have a specific issue you would like to ask our experts? Email us your tricky spot and see how we can help you!